
Introduction
The joy of turning something unwanted into something new is so satisfying and I wanted to share with you a really easy sewing project with you. Sewing! Before you sigh and switch over, reminded of disastrous classes at school, I promise this is an easy project to start with – you don’t even need a sewing machine, you can do this by hand with a simple running stitch.
So here’s my step by step guide to turn a shirt into a toddler dress.
You will need
- x1 gentleman’s shirt – a thick cotton shirt will be robust for summer, or go for a corduroy one for an autumnal pinafore dress
- A toddler dress, to use as a template
- Needle and thread – if you have a sewing machine it will, of course, be quicker
- Scissors
- Pins
- Optional – extra fabric to make embellishments and decorations for the dress
Step 1 – Preparation

Lay your existing dress over the shirt, making sure you line up the buttons down the middle of the dress. Allowing for a seam, check that the top button will then form the top of the new dress when it is sewn together. Pin the dress to the shirt into position, so it stays in place for cutting out.
Step 2 – Cutting Out
Allowing a 2cm seam, cut out the shirt to the same shape as the dress.


There was a pocket on the front of the shirt I used, which I removed and I ended up covering up later with a flower embellishment. But if your shirt has a pocket, you can always keep it, to make your project simple.
Don’t worry about raggedy edges (like mine!) – you’ll be making hems that will mean the edges will become neat at the end.

Step 3 – Pinning and sewing together
Next, lay the two pieces of the cut out shirt, right sides together.

Now pin the dress in the following places: up the two sides and across the top of the shoulder. Sew a running stitch (by hand or with the sewing machine) along where you have pinned.

Step 4 – Hems and ironing
Next job is to hem the remaining edges.
- Along the bottom of the dress
- Around the arm holes
- Around the neck

I folded the fabric twice over itself to give a nice neat finish. Pin into place and sew a running stitch to hold the hems into place.
Iron out the seams and press out the hems on your new dress.

Step 5 – Adding decoration (optional)
I got carried away and made a flower decoration for the front of the dress – to cover up the pocket I removed. To make the flower:
- Cut out three pieces of contrasting fabric as shown
- Layer them up and make a running stitch around the edges
- Add a button for the centre


Experiment with other embellishments: buttons into shapes; applique pictures; sew on badges; add ribbon or lace trim etc.

Step 6 – Wearing and enjoying your creation
Ta da! Your dress is ready. Great on it’s own as a cool summer dress. Or team with a T-shirt and/or leggings/tights for cooler weather.
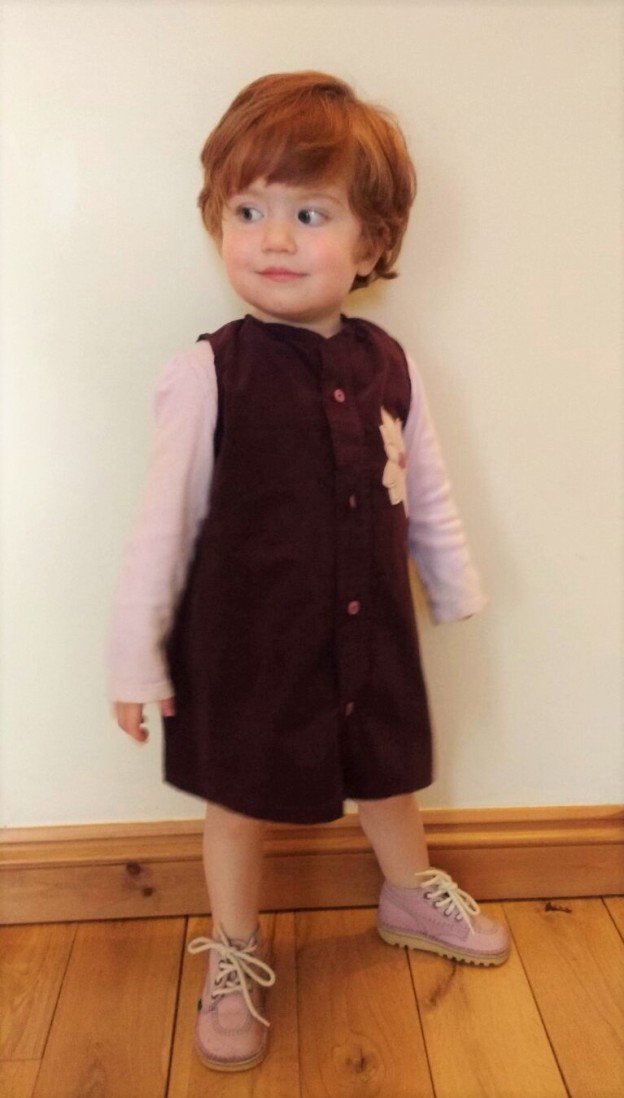
(Special thanks to my model, my niece Connie!)
More ideas
For more ideas on upcycling and customising clothes, see my board called ‘Customise’ on my Pinterest page:
